The Windows operating system has all the best utilities and features to function and fix most of the issues automatically. A Windows PC without internet is just a gaming station. If you have encountered Windows 11 Wi-Fi issues on your laptop or desktop, you can fix them with quick tricks. Windows 11 Wi-Fi problems can be due to several reasons.
You can perform linear and logical troubleshooting to find and fix no Wi-Fi issues on Windows. You may need to connect an Ethernet cable to establish a wired network connection to perform these troubleshooting steps.
Fix No Wi-Fi Issue on Laptop
There can be several ways to diagnose and fix Windows 11 Wi-Fi issues.
Restart the PC
Whenever you encounter a No Wi-Fi issue on your laptop, the first step you can perform is to restart your laptop. If there is any conflict in the settings, or there is any app conflict, it should be resolved with a restart. Restart and try to connect if the Wi-Fi issue is resolved.
Reset Wi-Fi Connection
There are possibilities that your Wi-Fi connection is not paired properly. You can forget the connection and try to establish a new connection.
Step 1. Click on the Wi-Fi icon on the bottom right and then click on the Arrow icon next to the Wi-Fi connection.

Step 2. Right-click on your network name and click on the Forget option. It will remove the existing settings of the Wi-Fi connection.

Step 3. Disable and enable the Wi-Fi connection again and search for your Wi-Fi network.
Step 4. Click on your Wi-Fi connection and enter the password to connect. Check if you are able to fix Windows 11 Wi-Fi issues or if we need to drill down.
Run Wi-Fi Diagnostic Test
Running a Wi-Fi diagnostic test will be the best option to automatically diagnose and identify the reasons why Windows 11 Wi-Fi is not working. It is an inbuilt utility to quickly run a check.
Step 1. Press the Win key and go to Settings. Also, try (Win + I) for the same.
Step 2. You will be on the Systems tab in the left panel. Click on the Troubleshoot option in the right panel. On the next screen, click on the Other Troubleshooters option.
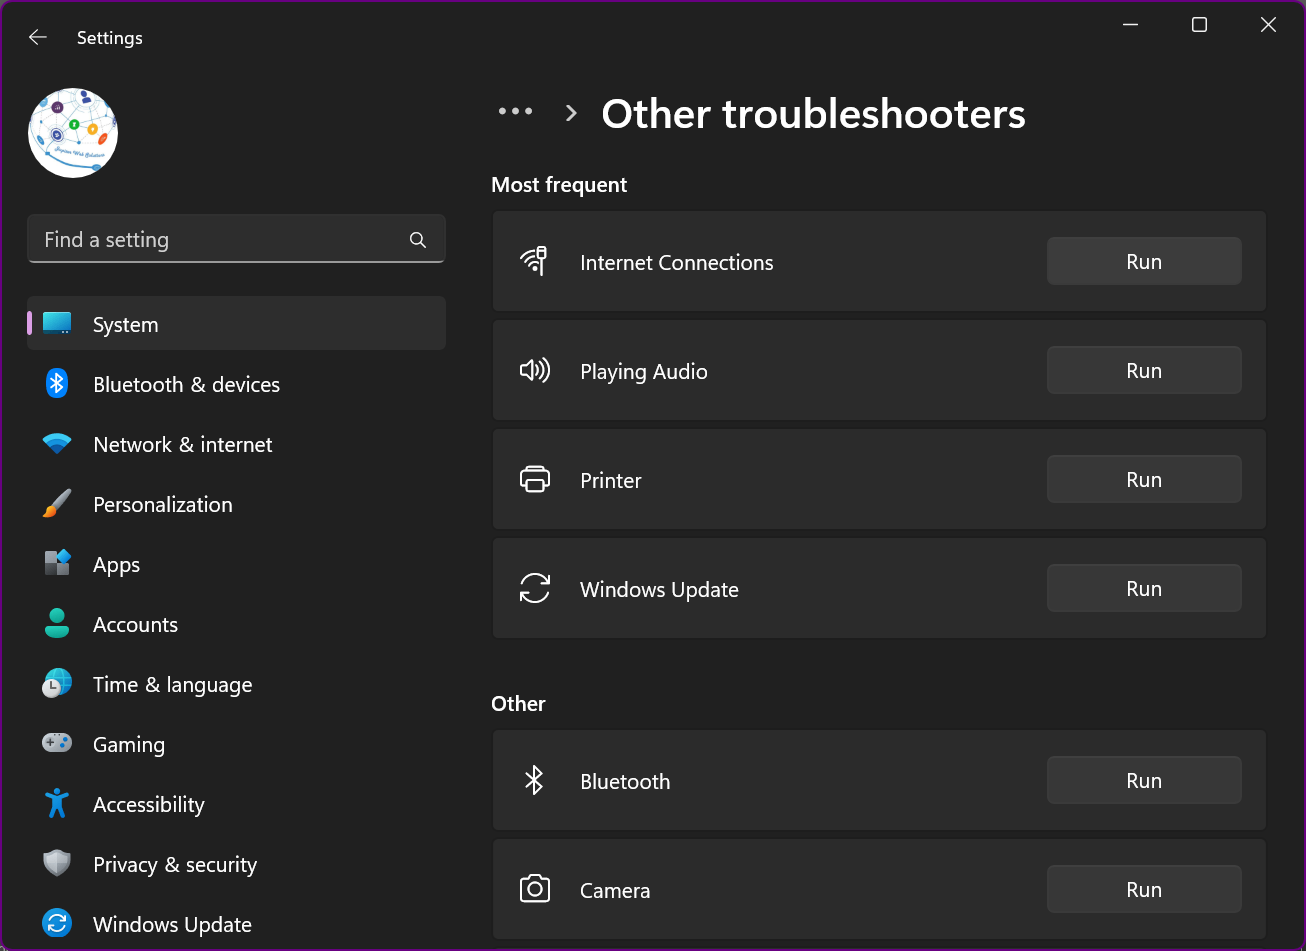
Step 3. It will show a list of diagnostic tests that you can run. Click on the Run button in front of the Internet Connections option. This will run a diagnostic test and identify the issue.
Step 4. Follow the on-screen instructions and fix the issue identified.

Alternatively, you can also come to the Windows Settings and go to the Network & Internet option. Click on your Wi-Fi name and if the status shows disconnected, click on Change Network Settings and select the Network Troubleshooter link to run Windows Troubleshooter.
Install Windows Updates
Installing Windows Updates can fix most of the issues related to your Windows settings. If the automatic updates are paused or not working properly, you can check for Windows Updates manually.
Step 1. Press the Win key and go to Settings.
Step 2. Click on the Windows Update option on the top right or at the bottom left.
Step 3. Check for Windows Updates and let it come up with the latest updates.
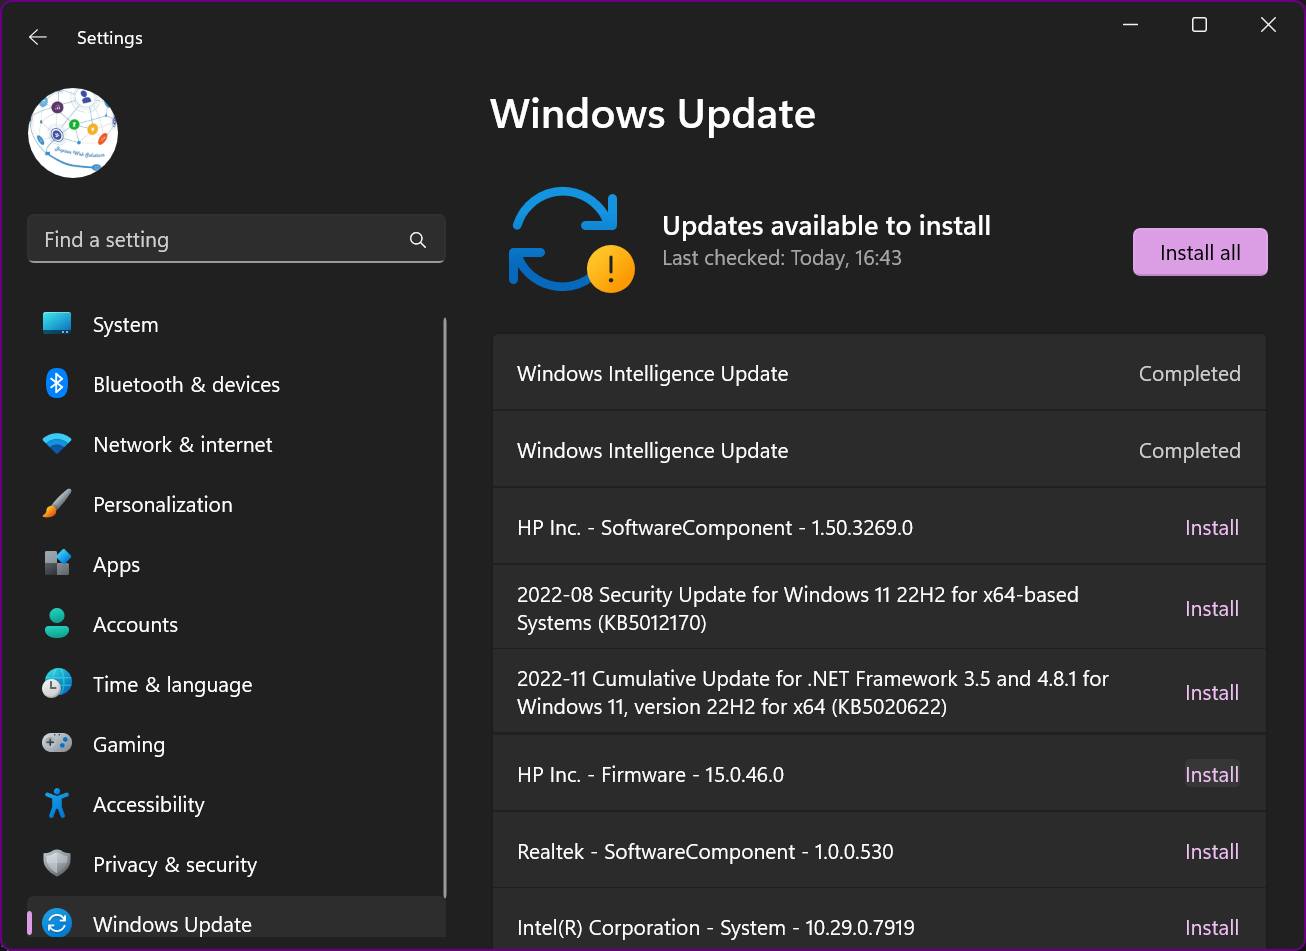
Step 4. Click on the Install All link to install all the latest Windows Updates on your Windows. To finish installing the latest updates, restart your laptop and check if you are able to connect.
Check Wi-Fi Range
Ensure that you are in the Wi-Fi range and able to connect other devices to the same network. If other devices are connecting successfully, it indicates that there is no issue from the ISP. It is just the Windows Settings that we need to check.
Update Drivers
When all the settings are configured properly, it is time to check for the latest Wi-Fi Drivers. This is one of the checks that we perform to fix Windows 11 Wi-Fi issues.
Step 1. Right-click on the Start button and select Device Manager.
Step 2. Expand the Network Adapters section to check for the Wireless adapter.

Step 3. Right-click on the Wireless Adapter and click on the Update Driver option.
Step 4. Click on the ‘Search automatically for Drivers’ option and let it configure the latest drivers for Windows. Follow the on-screen instructions and restart your Windows to check if it worked.
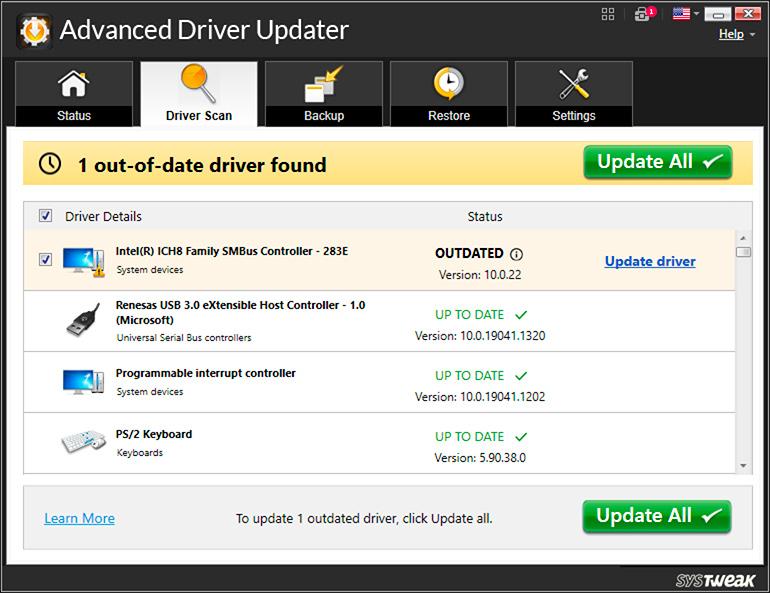
Advanced Driver Updater is one of the robust driver updater software for Windows to automatically find the best compatible Wi-Fi driver and install it on the PC. It has a large pool of database that keeps on updating itself with every latest driver. It can update drivers for all devices and peripherals compatible with Windows 11 and earlier versions.
Fix No Wi-Fi Issue on a Desktop
You must be using a Wi-Fi adapter to connect wirelessly on your desktop. Once you connect the adapter, the troubleshooting steps remain the same to fix Windows 11 Wi-Fi issues. The only additional step is to update USB drivers, reseat the USB Wi-Fi adapter, and establish a wired connection.
Final Words
This article on how to fix Windows 11 Wi-Fi not working has the best checks that you can perform to diagnose and troubleshoot wireless connectivity issues. We have performed linear and logical troubleshooting to identify if the issues are with the computer or the ISP. These troubleshooting steps are good enough to fix Windows 11 Wi-Fi issues.